Teachers Change the World: A Practical Guide to Using This Embroidery Design
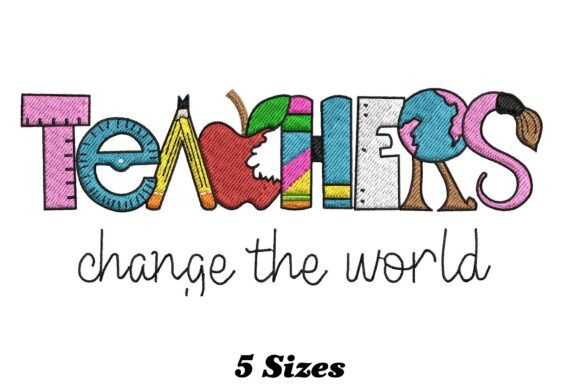
The phrase "Teachers Change the World" resonates deeply because it speaks to a universal truth about mentorship, guidance, and the lasting impact of education. When translated into a machine embroidery design, this sentiment transforms from a simple slogan into a tangible expression of gratitude and appreciation. Whether you are looking to spruce up fabrics for t-shirts, towels, or home decor, this fun and whimsical touch brings personality to any item. However, moving from a digital file to a physical stitched product requires more than just hitting the "start" button on your machine. Understanding the nuances of this specific design ensures your final project looks professional rather than amateurish.
Understanding the Appeal and Application
People are drawn to the Teachers Change the World design because it serves multiple purposes. For educators, it is a badge of honor; for parents and students, it is a heartfelt gift; and for small business owners, it represents a niche market with consistent demand around back-to-school seasons and Teacher Appreciation Week. The charm lies in its versatility. Unlike complex pictorial designs that require high thread counts and expensive stabilizers, text-based whimsical designs often balance legibility with decorative flair.
This machine embroidery design comes with multiple embroidery file formats, making it compatible with various brands of embroidery machines. This flexibility is a significant advantage, but it also introduces a layer of complexity that beginners often overlook. The ability to use the design across different platforms means you must understand how your specific machine interprets those files to avoid wasted time and materials.
Common Pitfalls in File Selection and Preparation
One of the most frequent mistakes creators make is assuming that all file formats are created equal. You might download a package containing .PES, .DST, .JEF, and other extensions, but not all machines handle these formats with the same level of precision. If you force a file format that your machine does not natively support by using third-party conversion software, you risk distorting the lettering or misaligning the whimsical elements of the design.
Why this matters: Poor file compatibility can lead to skipped stitches, uneven tension, or text that appears warped. In the context of a message like "Teachers Change the World," clarity is paramount. If the letters are fuzzy or the spacing is off, the emotional impact of the message is lost. Always verify that the file format matches your machine's native requirements before attempting to stitch. If conversion is necessary, test it on scrap fabric first to ensure the digitization holds up under pressure.
Choosing the Right Fabric and Stabilizer
Another overlooked detail is the relationship between the design density and the fabric weight. Beginners often attempt to embroider heavy text designs on thin, stretchy fabrics like jersey knit without adequate stabilization. While a t-shirt is a popular canvas for this design, the fabric's natural give can cause the hoop to distort the material, leading to puckering around the text.
To avoid this, select a cut-away stabilizer for knits or a tear-away for woven fabrics like towels and home decor items. The stabilizer acts as a foundation, holding the fabric taut so the needle can penetrate cleanly. Without it, the "whimsical touch" you intended can turn into a bunched-up mess that ruins the garment. Remember, the quality of your backing is just as important as the quality of your thread.
Color Management and Thread Efficiency
When evaluating the Teachers Change the World design, pay close attention to the color count. Some versions of this design may feature gradient effects or multiple shades to create depth. While visually appealing, a high number of color changes increases production time and thread waste. For entrepreneurs producing gifts in bulk, every extra stop-and-start adds minutes to the process, which directly impacts your bottom line.
A practical approach is to review the design preview on your computer screen before loading the hoop. Look for unnecessary trims or redundant colors. Sometimes, simplifying the palette to two or three contrasting colors can maintain the design's charm while significantly improving efficiency. Additionally, ensure your thread choice matches the fabric. Using a matte cotton thread on a shiny satin pillowcase can look mismatched, whereas a polyester or rayon thread might provide the necessary sheen to make the design pop.
Hooping Techniques for Text-Based Designs
Text-based embroidery demands precision in hooping. If the fabric shifts even slightly during stitching, the letters can become misaligned, making the phrase difficult to read. This is particularly critical for long phrases like "Teachers Change the World." A common error is hooping too loosely, thinking it will prevent stretching. In reality, loose hooping causes the fabric to ripple, resulting in jagged edges on the letters.
The solution is to practice the "tight drum" method. Your fabric should be stretched within the hoop until it feels like a drumhead. If you are working with delicate items like towels, consider using a floating technique where the fabric is secured over a piece of stabilizer in the hoop, rather than clamping the towel itself, which can leave permanent marks.
Evaluating Quality Before Purchase
Before buying or downloading this design, take a moment to inspect the sample images provided by the seller. High-quality digitization will show smooth curves and clean fill patterns. Low-quality designs often exhibit jagged edges or excessive jump stitches, which are the tiny lines connecting different parts of the design. These jump stitches can get caught in the fabric if not trimmed correctly, creating a messy finish.
Check if the design includes a preview of the stitch count. A very low stitch count for a large design usually indicates poor resolution, meaning the letters will look pixelated when stitched. Conversely, an excessively high stitch count might indicate over-digitization, which wastes thread and time without adding visual value. Aim for a balanced stitch count that ensures clarity without inefficiency.
Final Thoughts on Execution
Sprucing up fabrics with the Teachers Change the World embroidery design is a rewarding project that combines technical skill with emotional resonance. By avoiding common mistakes related to file formats, stabilizer selection, and hooping techniques, you ensure that your final product communicates the intended message with clarity and style. Whether you are creating a personal gift or launching a small business line of teacher appreciation items, attention to detail is what separates a good project from a great one.
Take the time to test your settings, choose the right materials, and respect the capabilities of your machine. With these practical steps, you can confidently bring this charming design to life, knowing that your craftsmanship honors the sentiment behind the words.