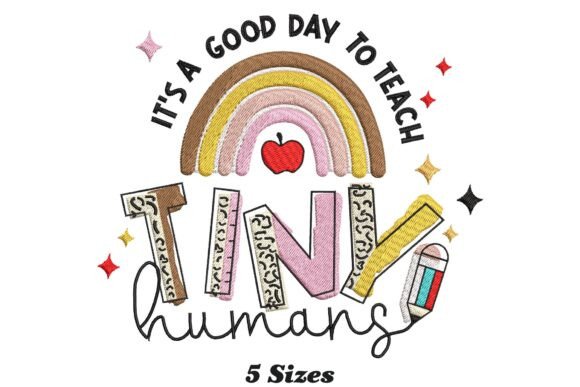
It's a Good Day to Teach: Elevating Your Projects with Whimsical Embroidery
There is a distinct joy in transforming a plain fabric into a statement piece that speaks to your personality or profession. When you choose a design like It's a Good Day to Teach, you are selecting more than just a pattern; you are choosing a sentiment that resonates deeply with educators, mentors, and anyone who loves to share knowledge. This charming embroidery design offers a fun, whimsical touch that instantly brings life to t-shirts, towels, and home decor items. However, the difference between a professional-looking finish and a frustrating project often lies not in the machine itself, but in how you approach the preparation, file selection, and application of the design.
Understanding the Appeal and Versatility of the Design
The phrase "It's a Good Day to Teach" captures a moment of optimism and dedication. For teachers, this design serves as a perfect morale booster for back-to-school gear, classroom decorations, or gifts for colleagues. But its appeal extends beyond the education sector. It works beautifully for parents teaching their children, coaches mentoring athletes, or even hobbyists sharing skills at community workshops. The whimsical nature of the typography and accompanying elements makes it versatile enough for casual wear yet refined enough for home accents like throw pillows or kitchen towels.
Because this machine embroidery design comes with multiple file formats, it promises compatibility with a wide range of embroidery machines. This flexibility is a significant advantage, allowing beginners using entry-level hoops and professionals with industrial arms to utilize the same creative asset. Yet, having the files is only the first step. Many users rush to stitch without considering the specific demands of the design on different materials, leading to puckering, thread breaks, or misaligned text.
Common Pitfalls When Choosing and Preparing Files
One of the most frequent misunderstandings involves the assumption that all file formats are created equal or that one size fits every machine. While the package includes various formats such as .PES, .DST, .JEF, and others, simply downloading the file does not guarantee a successful stitch-out. A common mistake is ignoring the hoop size requirements listed in the product description. If you attempt to stitch a design intended for a 5x7 inch hoop on a smaller 4x4 inch frame, the software may truncate parts of the text or distort the whimsical graphics, ruining the aesthetic.
Another overlooked detail is the density of the stitches relative to the fabric weight. "It's a Good Day to Teach" likely features a mix of satin stitches for the lettering and fill stitches for decorative elements. On lightweight fabrics like thin cotton t-shirts, high-density stitching can cause the material to pucker severely, making the garment uncomfortable to wear. Conversely, on heavy canvas or denim, insufficient stabilizer can lead to registration errors where the top layer of thread sits unevenly over the base.
These errors affect the final presentation significantly. A puckered shirt looks amateurish and may be unwearable, while a misaligned design on a towel can make the message difficult to read. The cost of wasted thread, time spent re-hooping, and damaged fabric adds up quickly, turning a fun weekend project into a source of frustration.
How to Avoid File and Format Errors
To ensure a smooth experience, always verify the maximum dimensions of the design against your machine's capabilities before purchasing or downloading. Check the product details for the recommended hoop size. If your machine has a larger hoop than required, center the design carefully within the digital workspace to prevent unnecessary travel time and potential needle strikes.
Furthermore, take the time to test the design on a scrap piece of the actual fabric you intend to use. This "test run" allows you to adjust tension settings and stabilize choices before committing to your final item. If the design appears too dense for a light tee, consider switching to a lighter thread weight or reducing the stitch count slightly if your software permits. These small adjustments demonstrate a proactive approach that saves resources and ensures a polished result.
Material Selection and Stabilization Strategies
The success of any embroidery project hinges heavily on the relationship between the fabric and the stabilizer. A frequent error is underestimating the need for stabilization when working with stretchy knits or textured surfaces like terry cloth towels. The phrase "It's a Good Day to Teach" relies on crisp, readable lettering. If the fabric shifts during stitching, the letters can become wavy or illegible.
For t-shirts, a cut-away stabilizer is often superior to tear-away because it provides permanent support that prevents the stitches from pulling the fabric out of shape over time. For towels, which have a thick pile, a water-soluble stabilizer placed on top of the fabric can help keep the loops flat during stitching, ensuring the needle penetrates cleanly without snagging the fibers.
Neglecting these steps can compromise the durability of the item. A poorly stabilized design on a frequently washed towel may begin to fray or lose definition after a few cycles. By investing in the correct stabilizer type, you protect the integrity of the design and extend the lifespan of the finished product.
Practical Checks Before You Stitch
Before loading your design into the machine, perform a visual inspection of the digitized file. Look for any floating threads or areas where the stitch direction might conflict with the grain of the fabric. Ensure that the design is properly nested so that there are no gaps between the satin columns of the letters. Additionally, double-check that the color sequence in your machine matches the thread colors you have loaded. A mismatch here can result in a jarring visual effect that detracts from the charm of the design.
If you are creating custom merchandise for sale or gifts, consistency is key. Use the same brand of thread and stabilizer for every item to maintain uniformity in texture and sheen. Document your settings—tension, speed, and hoop placement—so you can replicate the quality across multiple pieces. This attention to detail separates a hobbyist effort from a professional-grade creation.
Maximizing Value and Creativity
When you purchase a multi-format embroidery design like "It's a Good Day to Teach," you are acquiring a tool for creativity. To get the most value, explore different applications beyond the obvious. Consider combining this design with other motifs, such as apples, books, or chalkboards, to create a cohesive collection for a classroom party or a teacher appreciation event. The versatility of the file formats means you can easily transfer the design to different machines if you are collaborating with other makers or scaling up production.
Avoid the trap of treating the design as a static image. Experiment with thread colors to match seasonal themes or school colors. Using metallic threads for the outline or variegated floss for the fill can add a unique dimension that elevates the standard look. However, always remember that experimentation should be grounded in technical competence. Pushing the limits of your machine's capabilities without understanding the mechanics can lead to broken needles or damaged heads.
Ultimately, the goal is to create something that brings joy and utility. Whether you are sprucing up a gift for a favorite educator or launching a line of custom apparel, taking the time to prepare correctly ensures that the final result reflects the positive sentiment of the words themselves. By avoiding common pitfalls regarding file management, stabilization, and material choice, you can confidently bring this whimsical design to life, resulting in high-quality items that stand the test of time and use.