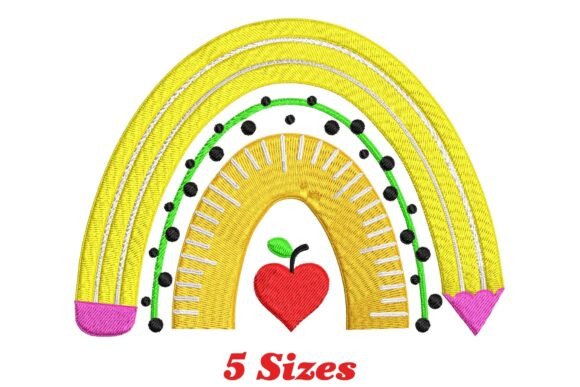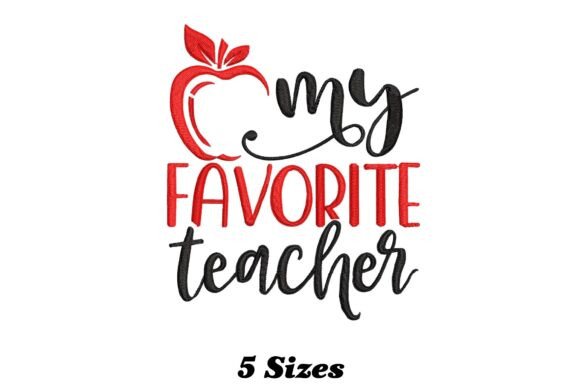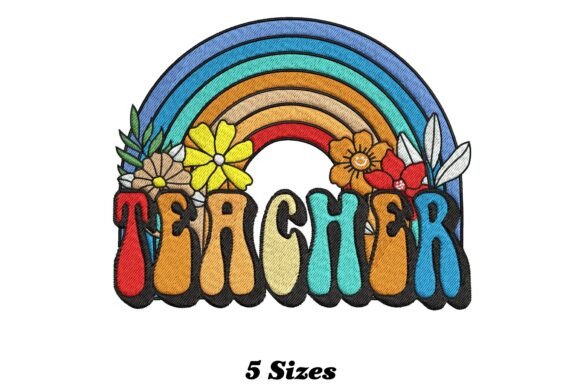
Retro Teacher Rainbow: A Whimsical Embroidery Design for Modern Fabrics
There is something undeniably charming about the intersection of nostalgia and modern craftsmanship. The Retro Teacher Rainbow design captures this perfectly, blending the playful aesthetic of vintage classroom decor with the vibrant energy of a rainbow. It is more than just a pattern; it is a statement piece that transforms ordinary textiles into conversation starters. Whether you are stitching a custom t-shirt for a favorite educator, adding a splash of color to a kitchen towel, or creating unique home decor items, this machine embroidery design offers a delightful way to express appreciation and creativity.
However, bringing a digital design to life on fabric involves more than simply hitting "start" on your embroidery machine. Many enthusiasts, from hobbyists to small business owners, overlook critical details during the preparation and execution phases. These oversights can lead to puckered fabric, tangled threads, or a final product that lacks the crisp definition the original artwork promises. Understanding how to properly utilize the Retro Teacher Rainbow file formats and apply best practices ensures your project looks professional and stands the test of time.
Understanding the Appeal and Versatility of the Design
The allure of the Retro Teacher Rainbow lies in its adaptability. In an era where personalized gifts and custom merchandise are highly valued, this design serves as a versatile asset for various applications. For educators, it represents a fun, non-traditional take on their profession, moving away from serious academic imagery toward something more lighthearted. For parents, it offers a cute motif for children's clothing or nursery decorations. Entrepreneurs selling at craft fairs or online marketplaces find it particularly effective because it appeals to a broad demographic seeking cheerful, retro-inspired goods.
Unlike static printed graphics, machine embroidery adds texture and dimension. The raised stitches catch the light differently, giving the rainbow arcs and teacher motifs a tactile quality that prints cannot replicate. This design is specifically optimized to work well on diverse materials, from the soft loops of towels to the sturdy cotton of t-shirts and the structured fabrics used in home decor pillows. Its whimsical nature makes it ideal for projects intended to bring joy and warmth to a space or wardrobe.
Common Pitfalls When Choosing and Using Embroidery Files
Despite the simplicity of the concept, many creators encounter avoidable issues when working with designs like the Retro Teacher Rainbow. One of the most frequent mistakes is selecting the wrong file format for their specific machine. While the package includes multiple formats—such as .PES, .DST, .JEF, and others—not all machines handle every format equally well. Downloading a file without verifying compatibility can result in errors, failed downloads, or even damage to the machine's software if the file structure is corrupted or incompatible.
Another common oversight is ignoring the hoop size requirements. The Retro Teacher Rainbow is designed with specific dimensions in mind. Attempting to fit a large version of the design into a small hoop often forces the user to stitch in sections, which can lead to misalignment and visible seams in the final image. Conversely, using a hoop that is too large for a smaller version of the design can cause the fabric to shift during stitching, resulting in distorted lines and uneven tension.
Thread selection is another area where judgment calls can go awry. Because the design features a rainbow, it requires multiple color changes. Some users rush through these changes, failing to trim threads properly or secure knots, leading to loose ends on the backside of the project. Additionally, choosing low-quality thread that does not match the sheen or weight of the design can make the vibrant colors look dull or muddy, detracting from the overall charm of the piece.
How Mistakes Impact Quality and Satisfaction
The consequences of these seemingly minor errors are often significant. Puckering occurs when the stabilizer is insufficient or the fabric is pulled too tightly in the hoop. This creates a wrinkled appearance around the embroidery, making the garment uncomfortable to wear and unappealing to look at. For business owners, a single batch of products with poor stitching quality can damage their reputation and lead to customer returns, costing both money and trust.
Misalignment due to incorrect hooping can ruin the symmetry of the rainbow, making the design look amateurish rather than whimsical. If the colors bleed or the stitches are too dense because of improper settings, the fabric may become stiff and lose its natural drape. In the case of towels, excessive stitching density can reduce absorbency, rendering the item less functional. These issues directly affect the usability and longevity of the finished product, turning a potential masterpiece into a disappointing project.
Practical Steps to Ensure Professional Results
To avoid these pitfalls, start by thoroughly reviewing the technical specifications provided with the Retro Teacher Rainbow download. Confirm that the file format matches your machine's capabilities. If you are unsure, consult your machine's manual or the manufacturer's website. Once you have the correct file, prepare your workspace by selecting the appropriate stabilizer. For stretchy fabrics like t-shirts, a cutaway stabilizer provides the necessary support to prevent distortion. For towels or heavier items, a tear-away stabilizer might be sufficient, but always test on a scrap piece first.
Pay close attention to the thread path and color changes. Take the time to trim threads cleanly between colors and ensure that each knot is secured properly. This extra minute per color change significantly improves the neatness of the backside of your work. Furthermore, adjust your machine's tension settings based on the fabric type. If you notice loops forming on the underside or the thread pulling too tight on the top, recalibrate before starting the full design.
Finally, consider the placement of the design on your fabric. Use a water-soluble marker or chalk to lightly outline the area where the design will sit. This helps in positioning the hoop accurately and ensures the Retro Teacher Rainbow is centered and straight. By taking these deliberate steps, you transform a simple digital file into a high-quality, durable, and visually stunning embroidered piece that truly enhances your fabrics with a dash of charm.
Evaluating Your Project Before You Begin
Before committing to a large batch or a cherished gift, perform a quick evaluation checklist. Does your stabilizer choice match the fabric weight? Is your hoop size compatible with the design dimensions? Have you tested the thread colors for vibrancy against the background fabric? Are your needles sharp and appropriate for the material? Answering these questions affirmatively ensures a smooth stitching process. The Retro Teacher Rainbow is a wonderful tool for creativity, but its success depends on the care and precision applied during the creation process. With the right approach, you can produce items that are not only beautiful but also built to last.