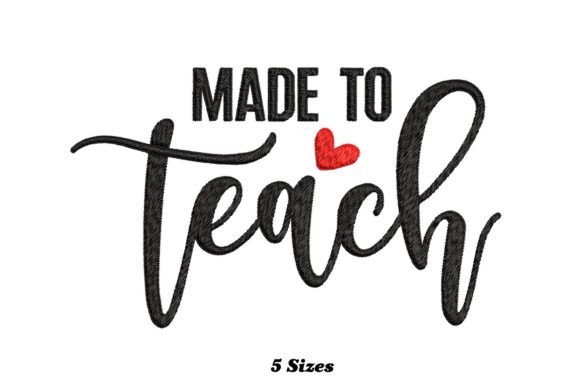
Made to Teach: A Charming Embroidery Design for Every Maker
If you have been looking for a way to inject personality into your textile projects, the Made to Teach embroidery design offers exactly that. It is more than just a phrase stitched onto fabric; it is a statement of purpose wrapped in a delightful aesthetic. Whether you are an educator wanting to celebrate your profession, a small business owner creating unique merchandise, or a hobbyist simply enjoying the process of machine embroidery, this design provides a versatile foundation. The charm lies in its ability to transform ordinary items like plain t-shirts, kitchen towels, and home decor accents into conversation starters. However, owning the file is only the first step. To truly unlock the potential of this design, you need to understand how to apply it correctly, avoid common pitfalls, and ensure your final product looks as professional as intended.
Understanding the Versatility of the Made to Teach Design
The appeal of Made to Teach stems from its adaptability. In the world of digital patterns, one size rarely fits all, yet this design has been crafted to work across a spectrum of applications. It is not limited to a single garment type or thread color scheme. For educators, it serves as a badge of honor on a tote bag or a teacher's apron. For parents, it might be a perfect addition to a nursery wall hanging. The design's structure allows for scaling without losing its legibility, which is crucial when moving from a small hoop project to a larger decorative piece.
What makes this specific pattern stand out is the inclusion of multiple embroidery file formats. This is a critical feature often overlooked by beginners who assume their machine will accept any download. By providing various formats, the creator ensures compatibility with major brands of embroidery machines, from domestic hobbyists' units to commercial industrial setups. This flexibility means you do not need to spend extra time converting files or worrying about compatibility issues before you can start stitching.
Common Mistakes When Choosing and Using Digital Patterns
Despite the ease of downloading digital designs, many makers encounter frustrating results because they skip essential evaluation steps. One of the most frequent errors involves assuming that a design will look identical on every fabric. The Made to Teach design features intricate lettering and potentially decorative elements that react differently depending on the material's texture and stability. If you attempt to stitch this design on a loose-knit sweater or a thin, flimsy cotton without proper preparation, the result can be puckering, skipped stitches, or distorted text.
Another widespread misunderstanding revolves around sizing. Many users download a design and immediately try to fit it into their largest hoop without considering the density of the stitches. Scaling a design too large can stretch the digitization beyond its limits, causing gaps in the fill or misaligned satin stitches. Conversely, making it too small can cause the threads to bunch up, creating a muddy appearance where the words "Made to Teach" become unreadable. These mistakes directly impact the quality of your finished product, turning a charming update into a disappointing failure.
Overlooking Stabilizer Requirements
A significant factor in poor embroidery outcomes is the neglect of stabilizers. Beginners often treat stabilizers as an optional add-on rather than a structural necessity. When working with a text-heavy design like Made to Teach, the tension required to form clear letters can pull the fabric if it is not adequately supported. Without the right cut-away or tear-away stabilizer, even the best digitized file will struggle to maintain its shape. This oversight leads to wasted thread, damaged fabric, and hours of frustration trying to fix a botched run.
How to Avoid Pitfalls and Ensure Professional Results
To get the most out of your Made to Teach purchase, you must approach the project with a methodical mindset. Before you even load the design into your machine, take the time to evaluate your materials. Ask yourself: Is this fabric stable enough? Do I have the correct stabilizer for this weight? If you are using a dark-colored t-shirt, remember that you may need a water-soluble topping to prevent the thread from sinking into the fibers, which obscures the crispness of the lettering.
Testing is non-negotiable. Always run a test stitch on a scrap piece of the exact fabric you intend to use. This simple step allows you to adjust tension settings, verify the hoop placement, and check the scale. If the test reveals that the text is too dense, you can reduce the size slightly or change the thread type. If the fabric is shifting, you can reinforce your hooping technique or switch to a stronger stabilizer. This proactive approach saves money on expensive threads and preserves your primary materials.
Checking File Formats and Machine Compatibility
One of the practical advantages of this design is the provision of multiple file formats, but this requires you to know your machine's requirements. Not all machines read the same file types. While some universal formats exist, many manufacturers use proprietary extensions. Before purchasing or downloading, double-check your machine's manual or software specifications. Ensure that at least one of the provided formats matches your device. If you are unsure, consult the documentation included with the download or reach out to the seller for clarification. Attempting to force a file into incompatible software can corrupt the data or result in a garbled stitch-out.
Furthermore, consider the capabilities of your machine's hoop sizes. If your machine only accommodates small hoops, verify that the design can be split or scaled down effectively without compromising the integrity of the text. Some complex designs cannot be divided easily, leading to awkward breaks in the stitching sequence. Understanding these technical constraints beforehand ensures a smooth workflow and prevents mid-project interruptions.
Evaluating Quality and Presentation for Business Use
For entrepreneurs and small business owners, the stakes are higher. Your embroidery represents your brand, and inconsistencies can damage your reputation. When using Made to Teach for products you intend to sell, consistency is key. You must standardize your process: the same stabilizer, the same thread brand, the same tension settings, and the same hoop pressure for every item. Variations in these areas can lead to a batch of products that look different from one another, confusing customers and lowering perceived value.
Presentation also matters. The design is meant to add a fun and quirky flair, but that flair must be executed cleanly. Inspect each finished piece for loose threads, pulled loops, or misaligned sections. A single visible flaw can detract from the overall charm. Taking the time to trim threads neatly and press the finished item (using a pressing cloth to protect the stitches) elevates the presentation significantly. This attention to detail separates amateur attempts from professional-grade goods.
Final Thoughts on Maximizing Your Embroidery Investment
The Made to Teach embroidery design is a powerful tool for adding character to your textiles, but its success depends on your preparation and execution. By avoiding common mistakes related to fabric choice, stabilizer usage, and file compatibility, you can ensure that your projects turn out beautifully every time. Remember that the design is only as good as the application. Take the time to learn your machine, respect the materials, and always test before committing to the final piece. With the right approach, you will create charming, high-quality items that truly reflect the spirit of the design.