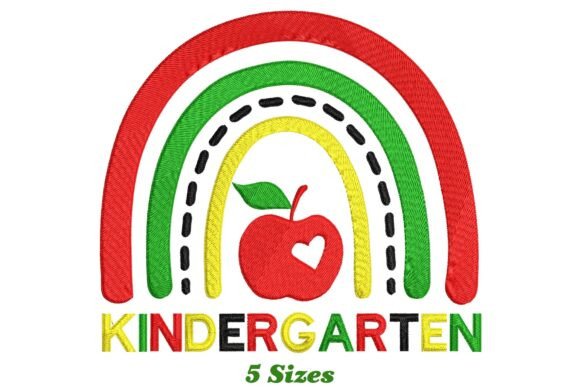
Kindergarten Rainbow: A Vibrant Embroidery Design for Every Project
There is a unique joy in transforming a plain piece of fabric into something that tells a story. The Kindergarten Rainbow machine embroidery design captures this sentiment perfectly, offering a whimsical and cheerful motif that instantly brightens any textile project. Whether you are looking to add a playful touch to children's t-shirts, personalize bath towels, or create charming home decor accents, this design serves as a versatile tool for creatives at every level. Its simple yet effective lines make it an ideal choice for those who want high-impact results without the complexity of intricate detailing.
However, even the most delightful designs can fall flat if not applied with care. Many enthusiasts dive straight into stitching without considering the technical nuances that separate a professional finish from a frustrating mess. Understanding how to properly select, prepare, and execute the Kindergarten Rainbow pattern is essential for ensuring your final product looks as good as you imagined. By addressing common pitfalls before they happen, you can save time, reduce material waste, and achieve a polished look that stands out.
Understanding the Versatility of the Kindergarten Rainbow Design
The appeal of the Kindergarten Rainbow lies in its adaptability. It is not merely a picture of a rainbow; it is a structured embroidery file designed to work across various stitch types and densities. This makes it suitable for a wide range of fabrics, from the sturdy cotton of a tote bag to the soft loops of a towel. For small business owners creating custom apparel, this design offers a quick way to add brand personality. For hobbyists, it provides a satisfying project that yields immediate visual gratification.
One of the key features that makes this design accessible is the inclusion of multiple file formats. Modern embroidery machines often require specific file extensions to read patterns correctly. Having access to these varied formats ensures compatibility with major brands like Brother, Janome, Bernina, and Singer. This flexibility removes a significant barrier to entry, allowing users to integrate the design into their existing workflow without needing expensive software conversions.
Common Mistakes That Ruin Embroidery Projects
Despite the simplicity of the concept, several frequent errors can compromise the quality of the finished piece. One of the most overlooked details is the selection of the stabilizer. Many beginners assume that all fabrics need the same backing support, but this is rarely true. If you attempt to embroider the Kindergarten Rainbow on a stretchy jersey knit or a delicate towel without the appropriate tear-away or cut-away stabilizer, the fabric will pucker. This distortion pulls the stitches out of alignment, making the vibrant colors look crooked and unprofessional.
Another common misunderstanding involves hoop tension. When hooping, it is tempting to pull the fabric as tight as possible to prevent movement. However, over-tightening can cause the fabric to shrink once removed from the hoop, leading to uneven stitch distribution. Conversely, under-hooping allows the fabric to shift during the stitching process, resulting in misaligned arches and broken color sequences within the rainbow. Finding the "drum-like" tension—firm but not stretched—is critical for maintaining the integrity of the design.
The Impact of Thread Choice and Color Matching
The visual impact of the Kindergarten Rainbow relies heavily on thread quality. Using cheap, low-grade polyester threads can lead to excessive lint buildup, which clogs the bobbin case and causes skipped stitches. Furthermore, poor-quality thread may lack the sheen necessary to make the rainbow pop against darker backgrounds. When choosing threads, opt for reputable brands known for consistent dye lots and smooth texture. This investment pays off in reduced machine maintenance and a cleaner, more vibrant final image.
Color placement is another area where mistakes frequently occur. While the design file dictates the sequence, the physical spools must be loaded in the exact order specified. Skipping a step or swapping two similar shades can ruin the gradient effect that defines the rainbow. Always double-check the thread path diagram provided with the download before starting the machine. Taking a moment to verify the setup prevents the frustration of having to rip out hours of work due to a simple loading error.
How to Avoid Pitfalls and Ensure Success
To avoid these issues, preparation is your best defense. Before purchasing or downloading the Kindergarten Rainbow design, evaluate your specific project needs. Ask yourself what type of fabric you are working with and whether your current stabilizers are sufficient. If you are working with thick items like hoodies or plush toys, consider using a water-soluble topping to keep the stitches from sinking into the pile of the fabric. This technique ensures that the top layer of the embroidery remains crisp and visible.
Testing is also a non-negotiable step for achieving professional results. Never run a new design directly on your final garment. Instead, use a scrap piece of the same fabric, with the same stabilizer and thread, to create a test stitch-out. This practice allows you to identify potential problems such as thread breaks, density issues, or registration errors. Adjust your machine settings based on this test run. You might find that a slightly slower speed or a different needle size improves the flow of the stitches significantly.
Evaluating File Formats and Machine Compatibility
When acquiring the Kindergarten Rainbow design, pay close attention to the file formats included. While many sellers claim universal compatibility, some files may be outdated or corrupted. Check that the package includes standard formats like .PES, .DST, .JEF, or .EXP, depending on your machine brand. If you are unsure about your machine's requirements, consult the user manual or the manufacturer's website. Using an incompatible file can result in the machine failing to recognize the pattern entirely, wasting valuable time troubleshooting software issues.
Furthermore, consider the size of the design relative to your embroidery hoop. The Kindergarten Rainbow is available in various dimensions, but selecting a size too large for your hoop will force the machine to stop mid-stitch for re-hooping. This interruption often leads to registration marks where the fabric shifts between sections. Choose a size that fits comfortably within your hoop's working area to ensure a seamless, continuous stitch.
Practical Steps Before You Begin
Before you commit to a project, take a moment to review your workspace and materials. Ensure your machine is clean, oiled, and threaded correctly. A well-maintained machine is less likely to encounter mechanical failures during long runs. Organize your threads so they are easily accessible and free from tangles. These small organizational steps contribute to a smoother workflow and a higher quality outcome.
Finally, remember that the goal of using a design like Kindergarten Rainbow is to bring joy and personality to everyday items. By avoiding common mistakes and focusing on proper technique, you ensure that the final product reflects the care and effort you put into the creation process. Whether you are crafting gifts for family, stocking inventory for a small shop, or simply enjoying a weekend hobby, the right approach transforms a simple digital file into a cherished physical object. With the right preparation and attention to detail, your embroidery projects will consistently deliver the charm and quality they deserve.